

Some dogs have furry ears! While this can be adorable, in some cases excess hair in the ear canal can also trap dirt, debris, and moisture, predisposing your pup to an ear infection. Whether or not to pluck ear hair has been a controversial topic in the pet grooming and veterinary fields, so it is best to discuss recommendations with your vet.
If your dog has healthy ears and the excess hair is not causing a problem, they will likely recommend leaving it alone. However, dogs with a history of ear infections may benefit from hair removal. This can be done by your vet or groomer, but if you are interested in learning how to remove or pluck your dog’s ear hair at home, read on.
6 steps to remove your dog’s ear hair [step by step + video]
Dog’s ears are extremely sensitive. Inappropriate techniques to remove ear hair can cause pain and irritation, or even further predispose your dog to develop ear infections. Using sharp objects by a dog’s face can also put you both in a risky situation. If you feel uncomfortable or your dog shows signs of anxiety during this procedure, it is best to stop and discuss further recommendations with your vet.
1. Find a comfortable, quiet place and gather your supplies.
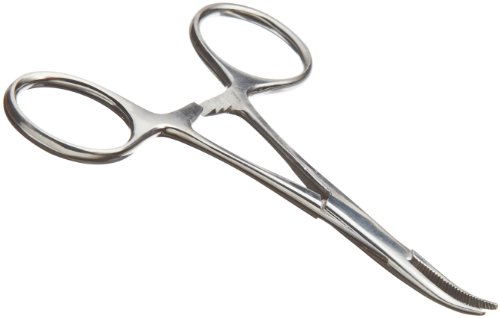
You will need hemostats, a helper to hold your dog, their favorite treats, and ear powder if you will be using it. Some people find that ear powder helps them get a better grip on the ear hairs.
2. Dip your hemostat in powder.
If you decide to use ear powder (see our product recommendations in the next section), dip your hemostat in a small amount of powder instead of pouring it into your dog’s ear. This will be less messy and there is less chance of powder getting in your dog’s eyes and nose, which can be irritating.
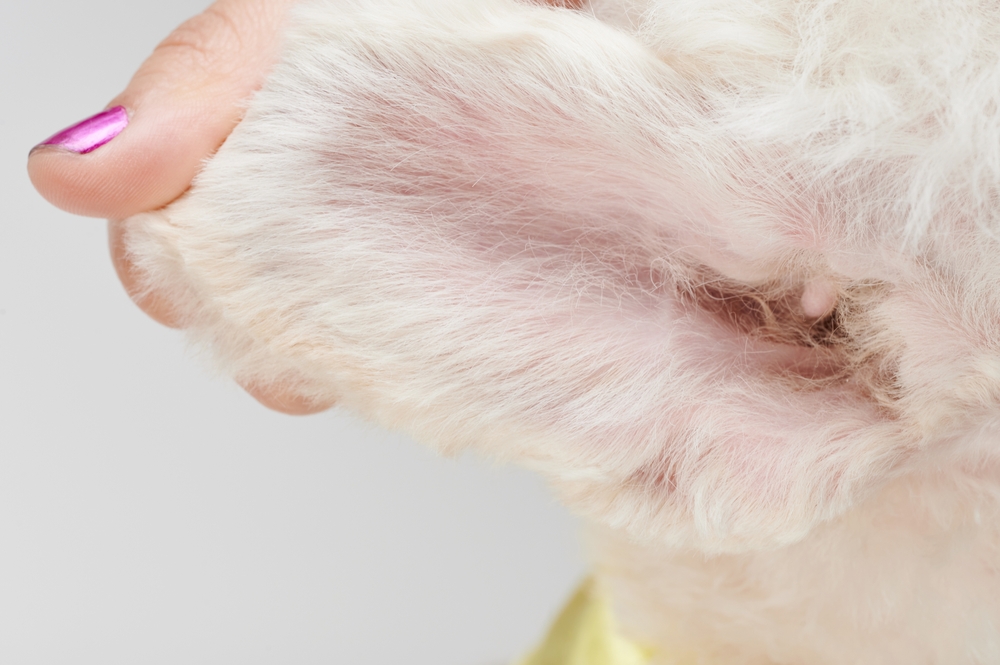
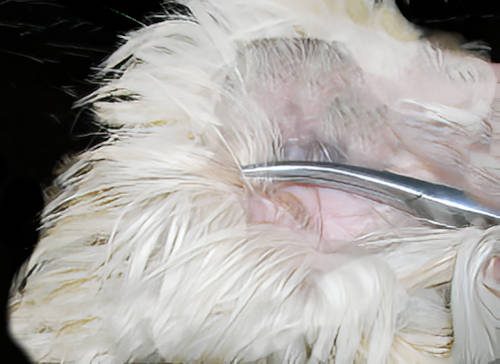
3. Grasp a small section of hair (approximately 4-5 hairs) with the hemostat
Attempting to pluck too much hair at once will be painful for your dog. Select a few hairs, as shown on the picture below.
4. Pull straight out with gentle traction OR twist the hair around the hemostat until it pulls out.
If the hair does not come out, you may be attempting too much hair at once. Do not continue to tug on your dog’s hair if your attempts are unsuccessful; instead, take a break and try again later or ask your vet or groomer for a demonstration.
5. Give your dog a treat
Reward your dog and take a break, before repeating the process. Watch the quick videos in the next section to understand how to use treats to make this process a lot easier for your dog!
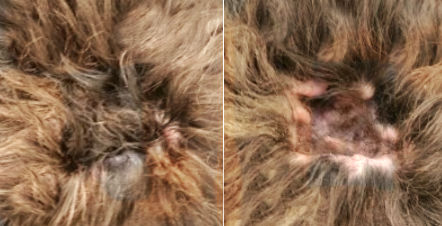
6. Continue this process until the ear canal is clear
Not all hair needs to be removed, just enough to allow adequate airflow into the canal. Give your dog a break (and a treat!) before repeating the process in the other ear.
You can watch an overview of the process with this video – although you should continue reading this article to view our recommended products and – most importantly – tips to help your dog enjoy the process with better de-sensitization:
Recommended products
If you would like to pluck your dog’s ear hair at home, you may need the following products:
1. A hemostat: Hemostats help you grip the hair and twist it to remove it safely and without causing excessive irritation. There are many high-quality options available.
2. An ear cleaner: A basic ear cleaner is good to have on hand when caring for your dog’s ears.
3. Ear powder: some groomers and pet parents use ear powder to help make the hair easier to grip. However, this powder can be irritating to your dog’s eyes and respiratory system if inhaled. If you feel that powder is necessary to help you grasp the hair, try dipping your hemostat into the powder instead of pouring it into your dog’s ear.
How will your dog react? Quick tips to make the process a lot easier.
It is important to pay attention to your dog’s cues and body language to avoid a situation that could be uncomfortable, or dangerous, for you both. You can watch these very short videos below to understand the best process to help put your dog at ease.
How to make sure your dog is ok with ear hair removal (Desensitization and counter-conditioning)
During any sort of grooming procedure, it is important to make sure that your dog is calm and comfortable. To help achieve this, it is best to put the time in to desensitize and counter-condition your pet. These 2 videos below by renowned Dr. Sophia Yin demonstrate how to train a dog to tolerate and even enjoy grooming and nail trims. In this first video, she describes how to use treats to let you groom your dog:
In the second video, she breaks the process into small steps (e.g. touching their paw with your hand, touching their paw with the nail clippers, etc.) and pairs each with lots of treats. The same technique can be used for any part of grooming that your dog feels nervous about, including ear cleaning or ear hair plucking.
If you notice signs of anxiety or pain, it is best to stop the procedure. If you and your vet feel that plucking your dog’s ear hair is critical for your dog’s health, they can work with you to provide medications to calm your pet, outline a protocol for behavioral desensitization, or perform the procedure in the veterinary clinic under sedation.
Signs of anxiety in dogs
Dogs will often show subtle signs of anxiety before their behavior escalates to growling or biting. It is important to watch your dog’s body language closely, especially when performing a procedure such as ear hair plucking. Common signs of anxiety in dogs include:
- Yawning, lip licking, or drooling
- Whining or whimpering
- Whale eye (wide eyes with whites visible)
- Changes to ears and body posture
- Panting
- Shedding
- Avoidance behavior (focusing on something else like licking themselves, looking elsewhere, moving their bodies to try to escape the situation)
Why remove your dog’s ear hair
Certain dog breeds (think Poodles, Shih Tzus, etc.) tend to have excessive hair in their ear canals. While in many cases this does not cause a problem, in others it can trap dirt, debris, and moisture, predisposing your pup to chronic or recurrent ear infections, and in some cases even affecting their hearing. Removing excess ear hair can also help ear medications get deeper into the ear canal to treat infections more effectively.
It is best to discuss recommendations with your vet before attempting ear hair removal. If your dog is prone to ear infections, it is also important to explore other possible causes, such as underlying allergies or hypothyroidism.
When is removing a dog’s ear hair unnecessary?
Many dogs never need to have hair removed from their ears. Unless it is recommended by your vet due to a history of chronic or recurrent ear infections, it is best to leave your dog’s ears as they are. Plucking hair from normal ears has a risk of causing irritation and inflammation, which can also predispose your dog to ear infections. Additionally, if your dog has an ear infection, do not attempt to remove their ear hair at home at that time, as it will be too painful. If you are concerned that the hair is so excessive that it is becoming matted or blocking the ear canal, you may consider trimming it with clippers or blunt scissors.
How else should you care for your dog’s ears?
Monitor your dog’s ears by looking for any signs of redness, pain, foul odor, or discharge/debris. It is also a good idea to handle your dog’s ears frequently, pairing this with praise or treats, to help build a positive association.
Some dogs may benefit from having their ears cleaned, especially if they have a history of ear infections or allergies. When you clean your dog’s ears, make sure you have ear cleaner, someone to help, and cotton balls. Then follow the steps below! Be sure to check out our recommendations on best ear cleaning solutions. If you have questions, your veterinary team will be happy to demonstrate how to clean your dog’s ears.
- Lift your dog’s ear flap and fill the ear canal with ear cleaner
- Gently massage the base of your dog’s ear for approximately 30 seconds to loosen debris. You should hear a squishy sound as your massage.
- Stand back and let your dog shake out the extra liquid
- Use cotton balls or gauze squares to wipe away debris (never use Q-tips)
- Praise and reward your dog
- Take a break if needed, then repeat on the other ear
- If your dog’s ears start to bleed, stop cleaning and make an appointment with your vet
Author
Disclaimer: This website's content is not a substitute for veterinary care. Always consult with your veterinarian for healthcare decisions. Read More.